今度はGetting Started with PHPを辿ってブラウザで確認できるまでやってみる。
アカウントは作ったけどrhcコマンドはインストールしていないのでリンク先からインストールする。僕の場合はMac版をインストール。
$ sudo gem install rhc
Password:
Fetching: net-ssh-2.9.2.gem (100%)
Successfully installed net-ssh-2.9.2
Fetching: net-scp-1.2.1.gem (100%)
Successfully installed net-scp-1.2.1
Fetching: net-ssh-gateway-1.2.0.gem (100%)
Successfully installed net-ssh-gateway-1.2.0
Fetching: net-ssh-multi-1.2.1.gem (100%)
Successfully installed net-ssh-multi-1.2.1
Fetching: archive-tar-minitar-0.5.2.gem (100%)
Successfully installed archive-tar-minitar-0.5.2
Fetching: highline-1.6.21.gem (100%)
Successfully installed highline-1.6.21
Fetching: commander-4.2.1.gem (100%)
Successfully installed commander-4.2.1
Fetching: httpclient-2.7.1.gem (100%)
Successfully installed httpclient-2.7.1
Fetching: open4-1.3.4.gem (100%)
Successfully installed open4-1.3.4
Fetching: rhc-1.38.4.gem (100%)
===========================================================================

If this is your first time installing the RHC tools, please run 'rhc setup'

===========================================================================
Successfully installed rhc-1.38.4
Parsing documentation for net-ssh-2.9.2
Installing ri documentation for net-ssh-2.9.2
Parsing documentation for net-scp-1.2.1
Installing ri documentation for net-scp-1.2.1
Parsing documentation for net-ssh-gateway-1.2.0
Installing ri documentation for net-ssh-gateway-1.2.0
Parsing documentation for net-ssh-multi-1.2.1
Installing ri documentation for net-ssh-multi-1.2.1
Parsing documentation for archive-tar-minitar-0.5.2
Installing ri documentation for archive-tar-minitar-0.5.2
Parsing documentation for highline-1.6.21
Installing ri documentation for highline-1.6.21
Parsing documentation for commander-4.2.1
Installing ri documentation for commander-4.2.1
Parsing documentation for httpclient-2.7.1
Installing ri documentation for httpclient-2.7.1
^@Parsing documentation for open4-1.3.4
Installing ri documentation for open4-1.3.4
Parsing documentation for rhc-1.38.4
Installing ri documentation for rhc-1.38.4
10 gems installed
初めてのインストールだったら'rhc setup'を実行しろと書いてあるので素直にやってみる。
$ rhc setup
OpenShift Client Tools (RHC) Setup Wizard

This wizard will help you upload your SSH keys, set your application namespace, and check that other programs like Git
are properly installed.

If you have your own OpenShift server, you can specify it now. Just hit enter to use the server for OpenShift Online:
openshift.redhat.com.
Enter the server hostname: |openshift.redhat.com|
サブドメインでそのまま使っているのでEnter。
You can add more servers later using 'rhc server'.
RSA 1024 bit CA certificates are loaded due to old openssl compatibility

Login to openshift.redhat.com: xxxxxxxx@hogehoge.com
Password: *********
素直に作成したアカウントのメールアドレスとパスワードを入力。
OpenShift can create and store a token on disk which allows to you to access the server without using your password. The
key is stored in your home directory and should be kept secret.  You can delete the key at any time by running 'rhc
logout'.
Generate a token now? (yes|no) yes
鍵を作っておくかと聞かれるので作っておく。
Generating an authorization token for this client ... lasts about 1 month

Saving configuration to /Users/xxxxx/.openshift/express.conf ... done

No SSH keys were found. We will generate a pair of keys for you.

    Created: /Users/xxxxxxx/.ssh/id_rsa.pub

Your public SSH key must be uploaded to the OpenShift server to access code.  Upload now? (yes|no) yes
鍵を作った後、今、サーバにアップロードをするか聞かれるのでyes
Since you do not have any keys associated with your OpenShift account, your new key will be uploaded as the 'default'
key.

Uploading key 'default' ... done

Checking for git ... found git version 2.5.4 (Apple Git-61)

Checking common problems .. done

Checking for a domain ... xxxxxxxxx

Checking for applications ... found 1

  php http://php-xxxxxxx.rhcloud.com/

  You are using 1 of 3 total gears
  The following gear sizes are available to you: small

Your client tools are now configured.
とりあえずrhcコマンドの準備は整った。
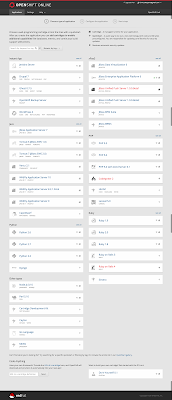
Once that is completed, open a terminal on a local machine and change into the directory where you would like the OpenShift application source code to be located. At the command prompt, enter the following command to create a PHP application:
$ rhc app create myphpapp php-5.4
アプリケーションを作成しよう。
今回は~/Documentフォルダの下に"OpenShift Project"を作成した上で、そこに移動しコマンドを入力する。
$ rhc app create myphpapp php-5.4
RSA 1024 bit CA certificates are loaded due to old openssl compatibility
Application Options
-------------------
Domain:     xxxxxxxxxx
Cartridges: php-5.4
Gear Size:  default
Scaling:    no

Creating application 'myphpapp' ... done


Waiting for your DNS name to be available ... done

Cloning into 'myphpapp'...
The authenticity of host 'myphpapp-xxxxxxxxxx.rhcloud.com (52.91.58.98)' can't be established.
RSA key fingerprint is SHA256:FeJCkIUL7D41FMGNtM5NYM4XoboxZGYEqH0WcAmOX+I.
Are you sure you want to continue connecting (yes/no)? yes
Warning: Permanently added 'myphpapp-xxxxxxxxxx.rhcloud.com,52.91.58.98' (RSA) to the list of known hosts.

Your application 'myphpapp' is now available.

  URL:        http://myphpapp-xxxxxxxxxx.rhcloud.com/
  SSH to:     56b61d5c89f5cf92a000003f@myphpapp-xxxxxxxxxx.rhcloud.com
  Git remote: ssh://56b61d5c89f5cf92a000003f@myphpapp-xxxxxxxxxx.rhcloud.com/~/git/myphpapp.git/
  Cloned to:  /Users/xxxxxx/Documents/OpenShift Project/myphpapp

Run 'rhc show-app myphpapp' for more details about your app.
これでリモートリポジトリとアプリが作成された。ローカルの中にもmyphpappというディレクトリができているので、中を見てみよう。
$ cd myphpapp/
$ ls -aFCl
total 80
drwxr-xr-x   5 xxxxxx  staff    170  2  7 01:22 ./
drwxr-xr-x   3 xxxxxx  staff    102  2  7 01:22 ../
drwxr-xr-x  13 xxxxxx  staff    442  2  7 01:22 .git/
drwxr-xr-x   7 xxxxxx  staff    238  2  7 01:22 .openshift/
-rw-r--r--   1 xxxxxx  staff  39585  2  7 01:22 index.php
ここで上で表示されたURLにブラウザからアクセスしてみる。
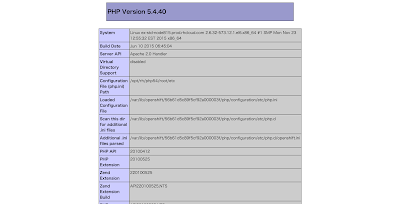
phpinfo()を書いたphpファイルを作成してみる。test.phpとかでいいか。
<?php
phpinfo();
gitでローカルリポジトリにコミットする。
$ git add --all
$ git commit -m "add test.php"
[master 6da6e33] add test.php
 Committer: xxxxxx xxxxxx@xxxxxx-no-MacBook-Pro.local>
Your name and email address were configured automatically based
on your username and hostname. Please check that they are accurate.
You can suppress this message by setting them explicitly. Run the
following command and follow the instructions in your editor to edit
your configuration file:

    git config --global --edit

After doing this, you may fix the identity used for this commit with:

    git commit --amend --reset-author

 1 file changed, 2 insertions(+)
 create mode 100644 test.php
その後、サイトにpushする。
$ git push
warning: push.default is unset; its implicit value has changed in
Git 2.0 from 'matching' to 'simple'. To squelch this message
and maintain the traditional behavior, use:

  git config --global push.default matching

To squelch this message and adopt the new behavior now, use:

  git config --global push.default simple

When push.default is set to 'matching', git will push local branches
to the remote branches that already exist with the same name.

Since Git 2.0, Git defaults to the more conservative 'simple'
behavior, which only pushes the current branch to the corresponding
remote branch that 'git pull' uses to update the current branch.

See 'git help config' and search for 'push.default' for further information.
(the 'simple' mode was introduced in Git 1.7.11. Use the similar mode
'current' instead of 'simple' if you sometimes use older versions of Git)

Counting objects: 3, done.
Delta compression using up to 4 threads.
Compressing objects: 100% (2/2), done.
Writing objects: 100% (3/3), 343 bytes | 0 bytes/s, done.
Total 3 (delta 0), reused 0 (delta 0)
remote: Stopping PHP 5.4 cartridge (Apache+mod_php)
remote: Waiting for stop to finish
remote: Waiting for stop to finish
remote: Building git ref 'master', commit 6da6e33
remote: Checking .openshift/pear.txt for PEAR dependency...
remote: Preparing build for deployment
remote: Deployment id is ffac86ca
remote: Activating deployment
remote: Starting PHP 5.4 cartridge (Apache+mod_php)
remote: Application directory "/" selected as DocumentRoot
remote: -------------------------
remote: Git Post-Receive Result: success
remote: Activation status: success
remote: Deployment completed with status: success
To ssh://56b61d5c89f5cf92a000003f@myphpapp-xxxxxx.rhcloud.com/~/git/myphpapp.git/
   9b470d5..6da6e33  master -> master
これでブラウザでアクセスしてみるときちんと反映された。


