ラベル 開発環境 の投稿を表示しています。 すべての投稿を表示

2016年2月7日日曜日

OpenShiftってSSHでログインもできるんだ

このエントリーをはてなブックマークに追加
Remote Connection (SSH)を見てみたら普通にSSHでGearにログインできるみたいなのでやってみた。


$ rhc ssh myphpapp
RSA 1024 bit CA certificates are loaded due to old openssl compatibility
Connecting to 56b61d5c89f5cf92a000003f@myphpapp-xxxxxx.rhcloud.com ...

    *********************************************************************

    You are accessing a service that is for use only by authorized users.
    If you do not have authorization, discontinue use at once.
    Any use of the services is subject to the applicable terms of the
    agreement which can be found at:
    https://www.openshift.com/legal

    *********************************************************************

    Welcome to OpenShift shell

    This shell will assist you in managing OpenShift applications.

    !!! IMPORTANT !!! IMPORTANT !!! IMPORTANT !!!
    Shell access is quite powerful and it is possible for you to
    accidentally damage your application.  Proceed with care!
    If worse comes to worst, destroy your application with "rhc app delete"
    and recreate it
    !!! IMPORTANT !!! IMPORTANT !!! IMPORTANT !!!

    Type "help" for more info.


[myphpapp-xxxxxx.rhcloud.com 56b61d5c89f5cf92a000003f]\>
でも使えるコマンドは限られてるみたい。
\> help
Help menu: The following commands are available to help control your openshift
application and environment.

gear            control your application (start, stop, restart, etc)
                or deps with --cart      (gear start --cart mysql-5.1)
tail_all        tail all log files
export          list available environment variables
rm              remove files / directories
ls              list files / directories
ps              list running applications
kill            kill running applications
mysql           interactive MySQL shell
mongo           interactive MongoDB shell
psql            interactive PostgreSQL shell
quota           list disk usage

Deprecated:
ctl_app         control your application (start, stop, restart, etc)
ctl_all         control application and deps like mysql in one command
簡単なの使ってみよう。
[myphpapp-xxxxxx.rhcloud.com 56b61d5c89f5cf92a000003f]\> ls
app-deployments  app-root  git php
[myphpapp-xxxxxx.rhcloud.com 56b61d5c89f5cf92a000003f]\> pwd
/var/lib/openshift/56b61d5c89f5cf92a000003f
ファイルやディレクトリは見える。
[myphpapp-xxxxxx.rhcloud.com 56b61d5c89f5cf92a000003f]\> ps -aef
UID         PID   PPID  C STIME TTY          TIME CMD
2385     182328 181214  0 13:13 ?        00:00:00 sshd: 56b61d5c89f5cf92a000003f@pts/1
2385     182339 182328  0 13:13 pts/1    00:00:00 /bin/bash --init-file /usr/bin/rhcsh -i
2385     189163 182339  2 13:14 pts/1    00:00:00 ps -aef
2385     423174      1  0 12:12 ?        00:00:00 /usr/sbin/httpd -c Include /var/lib/openshift/56b61d5c89f5cf92a000003f
2385     423175      1  0 12:12 ?        00:00:00 /usr/bin/logshifter -tag php
2385     423184 423174  0 12:12 ?        00:00:00 tee
2385     423185 423174  0 12:12 ?        00:00:00 tee
2385     423186 423174  0 12:12 ?        00:00:00 /usr/sbin/httpd -c Include /var/lib/openshift/56b61d5c89f5cf92a000003f
2385     434288 423174  0 12:14 ?        00:00:00 /usr/sbin/httpd -c Include /var/lib/openshift/56b61d5c89f5cf92a000003f
動いているプロセスも見えるみたい。
[myphpapp-xxxxxx.rhcloud.com 56b61d5c89f5cf92a000003f]\> cat /etc/redhat-release
Red Hat Enterprise Linux Server release 6.7 (Santiago)
OSはRedHat EnterPrise 6.7か。
[myphpapp-xxxxxx.rhcloud.com 56b61d5c89f5cf92a000003f]\> env
MANPATH=/opt/rh/php54/root/usr/share/man:
OPENSHIFT_SECRET_TOKEN=wD_1nmlzQ0FN8WHQ_Xs5hsUAiermXB5i7GVLGFP1N7w6_wGfnAT9PZNgwecEUpOGAJIp1ER8Ao-lGBwx8dU_8Q9fqn-R482B6JF9aySaXIXp9ScZZ8xY0Q_MeqZPzFJ1
OPENSHIFT_PHP_IDENT=redhat:php:5.4:0.0.28
OPENSHIFT_GEAR_MEMORY_MB=512
SELINUX_ROLE_REQUESTED=
OPENSHIFT_DEPLO
:
:
helpには書いてないけどenvで環境変数も見えるみたい。

Herokuよりも無料枠が良さげなOpenShiftでPHPをデプロイする

このエントリーをはてなブックマークに追加
Herokuよりも無料枠が良さげなOpenShiftをつかってみるでアカウントとGearを作ってPHP Cartridgeを用意した。

今度はGetting Started with PHPを辿ってブラウザで確認できるまでやってみる。

アカウントは作ったけどrhcコマンドはインストールしていないのでリンク先からインストールする。僕の場合はMac版をインストール。

$ sudo gem install rhc
Password:
Fetching: net-ssh-2.9.2.gem (100%)
Successfully installed net-ssh-2.9.2
Fetching: net-scp-1.2.1.gem (100%)
Successfully installed net-scp-1.2.1
Fetching: net-ssh-gateway-1.2.0.gem (100%)
Successfully installed net-ssh-gateway-1.2.0
Fetching: net-ssh-multi-1.2.1.gem (100%)
Successfully installed net-ssh-multi-1.2.1
Fetching: archive-tar-minitar-0.5.2.gem (100%)
Successfully installed archive-tar-minitar-0.5.2
Fetching: highline-1.6.21.gem (100%)
Successfully installed highline-1.6.21
Fetching: commander-4.2.1.gem (100%)
Successfully installed commander-4.2.1
Fetching: httpclient-2.7.1.gem (100%)
Successfully installed httpclient-2.7.1
Fetching: open4-1.3.4.gem (100%)
Successfully installed open4-1.3.4
Fetching: rhc-1.38.4.gem (100%)
===========================================================================

If this is your first time installing the RHC tools, please run 'rhc setup'

===========================================================================
Successfully installed rhc-1.38.4
Parsing documentation for net-ssh-2.9.2
Installing ri documentation for net-ssh-2.9.2
Parsing documentation for net-scp-1.2.1
Installing ri documentation for net-scp-1.2.1
Parsing documentation for net-ssh-gateway-1.2.0
Installing ri documentation for net-ssh-gateway-1.2.0
Parsing documentation for net-ssh-multi-1.2.1
Installing ri documentation for net-ssh-multi-1.2.1
Parsing documentation for archive-tar-minitar-0.5.2
Installing ri documentation for archive-tar-minitar-0.5.2
Parsing documentation for highline-1.6.21
Installing ri documentation for highline-1.6.21
Parsing documentation for commander-4.2.1
Installing ri documentation for commander-4.2.1
Parsing documentation for httpclient-2.7.1
Installing ri documentation for httpclient-2.7.1
^@Parsing documentation for open4-1.3.4
Installing ri documentation for open4-1.3.4
Parsing documentation for rhc-1.38.4
Installing ri documentation for rhc-1.38.4
10 gems installed

初めてのインストールだったら'rhc setup'を実行しろと書いてあるので素直にやってみる。

$ rhc setup
OpenShift Client Tools (RHC) Setup Wizard

This wizard will help you upload your SSH keys, set your application namespace, and check that other programs like Git
are properly installed.

If you have your own OpenShift server, you can specify it now. Just hit enter to use the server for OpenShift Online:
openshift.redhat.com.
Enter the server hostname: |openshift.redhat.com|

サブドメインでそのまま使っているのでEnter。

You can add more servers later using 'rhc server'.
RSA 1024 bit CA certificates are loaded due to old openssl compatibility

Login to openshift.redhat.com: xxxxxxxx@hogehoge.com
Password: *********

素直に作成したアカウントのメールアドレスとパスワードを入力。

OpenShift can create and store a token on disk which allows to you to access the server without using your password. The
key is stored in your home directory and should be kept secret.  You can delete the key at any time by running 'rhc
logout'.
Generate a token now? (yes|no) yes

鍵を作っておくかと聞かれるので作っておく。

Generating an authorization token for this client ... lasts about 1 month

Saving configuration to /Users/xxxxx/.openshift/express.conf ... done

No SSH keys were found. We will generate a pair of keys for you.

    Created: /Users/xxxxxxx/.ssh/id_rsa.pub

Your public SSH key must be uploaded to the OpenShift server to access code.  Upload now? (yes|no) yes

鍵を作った後、今、サーバにアップロードをするか聞かれるのでyes

Since you do not have any keys associated with your OpenShift account, your new key will be uploaded as the 'default'
key.

Uploading key 'default' ... done

Checking for git ... found git version 2.5.4 (Apple Git-61)

Checking common problems .. done

Checking for a domain ... xxxxxxxxx

Checking for applications ... found 1

  php http://php-xxxxxxx.rhcloud.com/

  You are using 1 of 3 total gears
  The following gear sizes are available to you: small

Your client tools are now configured.

とりあえずrhcコマンドの準備は整った。

Once that is completed, open a terminal on a local machine and change into the directory where you would like the OpenShift application source code to be located. At the command prompt, enter the following command to create a PHP application:

$ rhc app create myphpapp php-5.4

アプリケーションを作成しよう。
今回は~/Documentフォルダの下に"OpenShift Project"を作成した上で、そこに移動しコマンドを入力する。

$ rhc app create myphpapp php-5.4
RSA 1024 bit CA certificates are loaded due to old openssl compatibility
Application Options
-------------------
Domain:     xxxxxxxxxx
Cartridges: php-5.4
Gear Size:  default
Scaling:    no

Creating application 'myphpapp' ... done


Waiting for your DNS name to be available ... done

Cloning into 'myphpapp'...
The authenticity of host 'myphpapp-xxxxxxxxxx.rhcloud.com (52.91.58.98)' can't be established.
RSA key fingerprint is SHA256:FeJCkIUL7D41FMGNtM5NYM4XoboxZGYEqH0WcAmOX+I.
Are you sure you want to continue connecting (yes/no)? yes
Warning: Permanently added 'myphpapp-xxxxxxxxxx.rhcloud.com,52.91.58.98' (RSA) to the list of known hosts.

Your application 'myphpapp' is now available.

  URL:        http://myphpapp-xxxxxxxxxx.rhcloud.com/
  SSH to:     56b61d5c89f5cf92a000003f@myphpapp-xxxxxxxxxx.rhcloud.com
  Git remote: ssh://56b61d5c89f5cf92a000003f@myphpapp-xxxxxxxxxx.rhcloud.com/~/git/myphpapp.git/
  Cloned to:  /Users/xxxxxx/Documents/OpenShift Project/myphpapp

Run 'rhc show-app myphpapp' for more details about your app.

これでリモートリポジトリとアプリが作成された。ローカルの中にもmyphpappというディレクトリができているので、中を見てみよう。

$ cd myphpapp/
$ ls -aFCl
total 80
drwxr-xr-x   5 xxxxxx  staff    170  2  7 01:22 ./
drwxr-xr-x   3 xxxxxx  staff    102  2  7 01:22 ../
drwxr-xr-x  13 xxxxxx  staff    442  2  7 01:22 .git/
drwxr-xr-x   7 xxxxxx  staff    238  2  7 01:22 .openshift/
-rw-r--r--   1 xxxxxx  staff  39585  2  7 01:22 index.php

ここで上で表示されたURLにブラウザからアクセスしてみる。


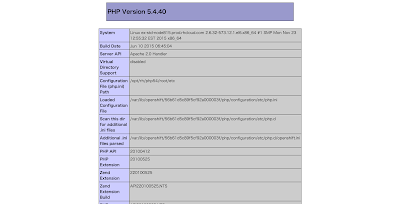
phpinfo()を書いたphpファイルを作成してみる。test.phpとかでいいか。

<?php
phpinfo();

gitでローカルリポジトリにコミットする。

$ git add --all
$ git commit -m "add test.php"
[master 6da6e33] add test.php
 Committer: xxxxxx xxxxxx@xxxxxx-no-MacBook-Pro.local>
Your name and email address were configured automatically based
on your username and hostname. Please check that they are accurate.
You can suppress this message by setting them explicitly. Run the
following command and follow the instructions in your editor to edit
your configuration file:

    git config --global --edit

After doing this, you may fix the identity used for this commit with:

    git commit --amend --reset-author

 1 file changed, 2 insertions(+)
 create mode 100644 test.php

その後、サイトにpushする。
$ git push
warning: push.default is unset; its implicit value has changed in
Git 2.0 from 'matching' to 'simple'. To squelch this message
and maintain the traditional behavior, use:

  git config --global push.default matching

To squelch this message and adopt the new behavior now, use:

  git config --global push.default simple

When push.default is set to 'matching', git will push local branches
to the remote branches that already exist with the same name.

Since Git 2.0, Git defaults to the more conservative 'simple'
behavior, which only pushes the current branch to the corresponding
remote branch that 'git pull' uses to update the current branch.

See 'git help config' and search for 'push.default' for further information.
(the 'simple' mode was introduced in Git 1.7.11. Use the similar mode
'current' instead of 'simple' if you sometimes use older versions of Git)

Counting objects: 3, done.
Delta compression using up to 4 threads.
Compressing objects: 100% (2/2), done.
Writing objects: 100% (3/3), 343 bytes | 0 bytes/s, done.
Total 3 (delta 0), reused 0 (delta 0)
remote: Stopping PHP 5.4 cartridge (Apache+mod_php)
remote: Waiting for stop to finish
remote: Building git ref 'master', commit 6da6e33
remote: Checking .openshift/pear.txt for PEAR dependency...
remote: Preparing build for deployment
remote: Deployment id is ffac86ca
remote: Activating deployment
remote: Starting PHP 5.4 cartridge (Apache+mod_php)
remote: Application directory "/" selected as DocumentRoot
remote: -------------------------
remote: Git Post-Receive Result: success
remote: Activation status: success
remote: Deployment completed with status: success
To ssh://56b61d5c89f5cf92a000003f@myphpapp-xxxxxx.rhcloud.com/~/git/myphpapp.git/
   9b470d5..6da6e33  master -> master

これでブラウザでアクセスしてみるときちんと反映された。

2016年2月5日金曜日

Herokuよりも無料枠が良さげなOpenShiftをつかってみる

このエントリーをはてなブックマークに追加
遅まきのHerokuデビューを無料枠でしたよ。準備編〜その1で書いたように今はdynoを落としておかないといけない時間も多くなったので、まだ制限の緩いOpenShiftを試してみることにした。

アカウント登録してサインインするとこんな画面になり新しいアプリケーションを登録することができる。


"Create your first application now"をクリックして進もう。

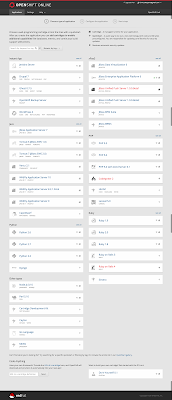
結構色々な"Application Type"が選べる。この中でシンプルに"PHP 5.4"を選ぶ。


ほぼデフォルトでいいだろう。Gearがサーバ、Cartridgeがパッケージみたいなものだと考えればいいのかな。セキュリティアップデートは勝手にかけてくれるらしい。若葉マークってどこの国でも一緒なのかw

PHP 5.4 Cartridge

PHP is a general-purpose server-side scripting language originally designed for Web development to produce dynamic Web pages. Popular development frameworks include CakePHP, Zend, Symfony, and Code Igniter.
OpenShift maintained
Receives automatic security updates

"Create Application"を押して、数十秒ぐらい待つと下記の画面が現れてGearが作成されたようだ。


今は"Not now, Continue"を選んで進む。


ここまででGearのベース設定は終了した。

次はGetting Started with PHPを元にソースをGearにデプロイしてブラウザで確認できるとこまでやってみよう。


2016年2月3日水曜日

遅まきのHerokuデビューを無料枠でしたよ。phpinfo()を作ってデプロイ編

このエントリーをはてなブックマークに追加
チュートリアルは分かったので、今度はスクラッチで作成して公開するまでの手順を確認しておこう。

まずは適当なディレクトリを作る。そしてそのディレクトリの下に移動。

$ mkdir phpinfo
$ cd phpinfo/

index.phpとcomposer.jsonを作る。composer.jsonは空に近い状態でいい。

phpinfo();
{
    "require": {
    }
}
このままcomposer updateを実行する。

$ composer update
Loading composer repositories with package information
Updating dependencies (including require-dev)
Nothing to install or update
Generating autoload files
そうするとvenderディレクトリが作成されているので、ここでgit initする。

$ git init
Initialized empty Git repository in /Users/hogahoga/Documents/HerokuProject/phpinfo/.git/
全てのファイルをaddし、ローカルリポジトリにコミットする。
$ git add *
$ git commit -m "Initial Commit"
[master (root-commit) 3852af9] Initial Commit
 Committer: Taro Yamada 
Your name and email address were configured automatically based
on your username and hostname. Please check that they are accurate.
You can suppress this message by setting them explicitly. Run the
following command and follow the instructions in your editor to edit
your configuration file:

    git config --global --edit

After doing this, you may fix the identity used for this commit with:

    git commit --amend --reset-author

 10 files changed, 520 insertions(+)
 create mode 100644 composer.json
 create mode 100644 index.php
 create mode 100644 vendor/autoload.php
 create mode 100644 vendor/composer/ClassLoader.php
 create mode 100644 vendor/composer/LICENSE
 create mode 100644 vendor/composer/autoload_classmap.php
 create mode 100644 vendor/composer/autoload_namespaces.php
 create mode 100644 vendor/composer/autoload_psr4.php
 create mode 100644 vendor/composer/autoload_real.php
 create mode 100644 vendor/composer/installed.json
ここでHerokuにログインする。
$ heroku login
Enter your Heroku credentials.
Email: Taro.Yamada@hogehoge.com
Password (typing will be hidden):
Logged in as Taro.Yamada@hogehoge.com
Heroku上にアプリを作成し、ローカルリポジトリにコミットしたファイルをHerokuにプッシュする。
$ heroku create
Creating app... done, stack is cedar-14
https://mysterious-depths-86346.herokuapp.com/ | https://git.heroku.com/mysterious-depths-86346.git
$ git push heroku master
Counting objects: 14, done.
Delta compression using up to 4 threads.
Compressing objects: 100% (11/11), done.
Writing objects: 100% (14/14), 4.72 KiB | 0 bytes/s, done.
Total 14 (delta 2), reused 0 (delta 0)
remote: Compressing source files... done.
remote: Building source:
remote:
remote: -----> PHP app detected
remote: -----> Bootstrapping...
remote: -----> Installing system packages...
remote:        NOTICE: No runtime required in composer.lock; using PHP ^5.5.17
remote:        - php (5.6.17)
remote:        - Apache (2.4.16)
remote:        - Nginx (1.8.0)
remote: -----> Enabling PHP extensions...
remote:        - ext-zend-opcache (automatic)
remote: -----> Installing dependencies...
remote:        Composer version 1.0.0-alpha11 2015-11-14 16:21:07
remote:
remote:  !     WARNING: Your Composer vendor dir is part of your Git repository.
remote:        This directory should not be under version control; only your
remote:        'composer.json' and 'composer.lock' files should be added, which
remote:        will let Composer handle installation of dependencies on deploy.
remote:        To suppress this notice, first remove the folder from your index
remote:        by running 'git rm --cached vendor/'.
remote:        Next, edit your project's '.gitignore' file and add the folder
remote:        '/vendor/' to the list.
remote:        For more info, refer to the Composer FAQ: http://bit.ly/1rlCSZU
remote:
remote:        Loading composer repositories with package information
remote:        Installing dependencies
remote:        Nothing to install or update
remote:        Generating optimized autoload files
remote: -----> Preparing runtime environment...
remote:        NOTICE: No Procfile, using 'web: vendor/bin/heroku-php-apache2'.
remote: -----> Checking for additional extensions to install...
remote: -----> Discovering process types
remote:        Procfile declares types -> web
remote:
remote: -----> Compressing...
remote:        Done: 73.9M
remote: -----> Launching...
remote:        Released v3
remote:        https://mysterious-depths-86346.herokuapp.com/ deployed to Heroku
remote:
remote: Verifying deploy.... done.
To https://git.heroku.com/mysterious-depths-86346.git
 * [new branch]      master -> master
ブラウザで確認する。
$ heroku open
Opening mysterious-depths-86346... done

よしよし、コツが分かったぞ。

2016年2月2日火曜日

遅まきのHerokuデビューを無料枠でしたよ。準備編〜その2

このエントリーをはてなブックマークに追加
さて昨日の遅まきのHerokuデビューを無料枠でしたよ。準備編〜その1からの続き。

さてHeroku上にアプリケーションを作成する。

Deploy the app

In this step you will deploy the app to Heroku.
Create an app on Heroku, which prepares Heroku to receive your source code:
$ heroku create
Creating sharp-rain-871... done, stack is cedar-14
http://sharp-rain-871.herokuapp.com/ | https://git.heroku.com/sharp-rain-871.git
Git remote heroku added
When you create an app, a git remote (called heroku) is also created and associated with your local git repository.
Heroku generates a random name (in this case sharp-rain-871) for your app, or you can pass a parameter to specify your own app name.

この後、GitHubから取ってきたソースをHerokuにデプロイしていくようだ。ローカルのgitリポジトリからHerokuのリモートリポジトリへアップする。なんかいっぱい入った。

$ git push heroku master
Counting objects: 140, done.
Delta compression using up to 4 threads.
Compressing objects: 100% (75/75), done.
Writing objects: 100% (140/140), 28.30 KiB | 0 bytes/s, done.
Total 140 (delta 51), reused 140 (delta 51)
remote: Compressing source files... done.
remote: Building source:
remote:
remote: -----> PHP app detected
remote: -----> Bootstrapping...
remote: -----> Installing system packages...
remote:        NOTICE: No runtime required in composer.json; requirements
remote:        from dependencies in composer.lock will be used for selection
remote:        - php (7.0.2)
remote:        - Apache (2.4.16)
remote:        - Nginx (1.8.0)
remote: -----> Enabling PHP extensions...
remote:        - ext-zend-opcache (automatic)
remote: -----> Installing dependencies...
remote:        Composer version 1.0.0-alpha11 2015-11-14 16:21:07
remote:        Loading composer repositories with package information
remote:        Installing dependencies from lock file
remote:          - Installing psr/log (1.0.0)
remote:            Downloading: 100%
remote:
remote:          - Installing monolog/monolog (1.16.0)
remote:            Downloading: 100%
remote:
remote:          - Installing symfony/routing (v2.7.3)
remote:            Downloading: 100%
remote:
remote:          - Installing symfony/http-foundation (v2.7.3)
remote:            Downloading: 100%
remote:
remote:          - Installing symfony/event-dispatcher (v2.7.3)
remote:            Downloading: 100%
remote:
remote:          - Installing symfony/debug (v2.7.3)
remote:            Downloading: 100%
remote:
remote:          - Installing symfony/http-kernel (v2.7.3)
remote:            Downloading: 100%
remote:
remote:          - Installing pimple/pimple (v1.1.1)
remote:            Downloading: 100%
remote:
remote:          - Installing silex/silex (v1.3.1)
remote:            Downloading: 100%
remote:
remote:          - Installing twig/twig (v1.19.0)
remote:            Downloading: 100%
remote:
remote:          - Installing symfony/twig-bridge (v2.7.3)
remote:            Downloading: 100%
remote:
remote:        Generating optimized autoload files
remote: -----> Preparing runtime environment...
remote: -----> Checking for additional extensions to install...
remote: -----> Discovering process types
remote:        Procfile declares types -> web
remote:
remote: -----> Compressing...
remote:        Done: 83.6M
remote: -----> Launching...
remote:        Released v3
remote:        https://dry-springs-12517.herokuapp.com/ deployed to Heroku
remote:
remote: Verifying deploy.... done.
To https://git.heroku.com/dry-springs-12517.git
 * [new branch]      master -> master

ここでwebインスタンスを1つ動かす。

The application is now deployed. Ensure that at least one instance of the app is running:
$ heroku ps:scale web=1

これでサイトの準備ができたので、下記のコマンドでデプロイされたアプリがブラウザで確認できる。
Now visit the app at the URL generated by its app name. As a handy shortcut, you can open the website as follows:
$ heroku open

できた!


起動させた時のログはheroku logsを使う。
$ heroku logs
2016-02-01T15:47:23.734744+00:00 heroku[api]: Enable Logplex by xxx@example.com
2016-02-01T15:47:23.734926+00:00 heroku[api]: Release v2 created by xxx@example.com
2016-02-01T15:58:25.346315+00:00 heroku[api]: Scale to web=1 by xxx@example.com
2016-02-01T15:58:25.441370+00:00 heroku[api]: Deploy b6e3898 by xxx@example.com
2016-02-01T15:58:25.441432+00:00 heroku[api]: Release v3 created by xxx@example.com
2016-02-01T15:58:25.818992+00:00 heroku[slug-compiler]: Slug compilation started
2016-02-01T15:58:25.818998+00:00 heroku[slug-compiler]: Slug compilation finished
2016-02-01T15:58:30.607022+00:00 heroku[web.1]: Starting process with command `vendor/bin/heroku-php-apache2 web/`
2016-02-01T15:58:33.451421+00:00 app[web.1]: 4 processes at 128MB memory limit.
2016-02-01T15:58:33.246369+00:00 app[web.1]: DOCUMENT_ROOT changed to 'web/'
2016-02-01T15:58:33.457058+00:00 app[web.1]: Starting php-fpm...
2016-02-01T15:58:33.289875+00:00 app[web.1]: Optimizing defaults for 1X dyno...
2016-02-01T15:58:35.463051+00:00 app[web.1]: Starting httpd...
2016-02-01T15:58:36.118632+00:00 heroku[web.1]: State changed from starting to up
2016-02-01T16:31:55.317376+00:00 heroku[web.1]: Idling
2016-02-01T16:31:55.318091+00:00 heroku[web.1]: State changed from up to down
2016-02-01T16:31:57.921272+00:00 heroku[web.1]: Stopping all processes with SIGTERM
2016-02-01T16:31:58.417151+00:00 app[web.1]: Going down, terminating child processes...
2016-02-01T16:31:59.165323+00:00 heroku[web.1]: Process exited with status 143
2016-02-01T16:56:47.735067+00:00 heroku[web.1]: Unidling
2016-02-01T16:56:47.735426+00:00 heroku[web.1]: State changed from down to starting
2016-02-01T16:56:53.261661+00:00 heroku[web.1]: Starting process with command `vendor/bin/heroku-php-apache2 web/`
2016-02-01T16:56:55.081581+00:00 app[web.1]: 4 processes at 128MB memory limit.
2016-02-01T16:56:54.967333+00:00 app[web.1]: DOCUMENT_ROOT changed to 'web/'
2016-02-01T16:56:54.980799+00:00 app[web.1]: Optimizing defaults for 1X dyno...
2016-02-01T16:56:55.085368+00:00 app[web.1]: Starting php-fpm...
2016-02-01T16:56:57.086777+00:00 app[web.1]: Starting httpd...
2016-02-01T16:56:57.159387+00:00 heroku[web.1]: State changed from starting to up

WEBワーカを止めるにはheroku ps:scale web=0で行う。

$ heroku ps:scale web=0
2016-02-01T18:14:22.506008+00:00 heroku[run.2596]: State changed from up to complete
2016-02-01T18:14:22.519362+00:00 heroku[run.2596]: Process exited with status 0
2016-02-01T18:21:32.196197+00:00 heroku[api]: Scale to web=0

2016年2月1日月曜日

遅まきのHerokuデビューを無料枠でしたよ。準備編〜その1

このエントリーをはてなブックマークに追加
結構前(3年ぐらい?)からHerokuは流行ってるのは知ってたんだけど、仕事内容でいまいち関わることが無かったのでスルーしてた。
でも最近になって触るような機会とPaaSの流行りがやっと来た感があるので試してみた。もうこんな記事はちまたに出回りすぎるぐらい出ているんだけど。

ちょっと前(2015年5月)にプライス設定が見直しになってたみたいで今は無料利用での制限が色々と厳しくなってる模様。それでも開発の時やテスト的には全然使えると思う。


  • SLEEPS AFTER 30 MINS OF INACTIVITY
    • 30分稼働がないとスリープしてしまう
  • MUST SLEEP 6 HOURS IN A 24 HOUR PERIOD
    • 24時間中、6時間はスリープする必要あり
  • CUSTOM DOMAINS
    • 独自ドメインが使える
  • 512 MB RAM │ 1 web/1 worker
    • dynoと呼ばれるプロセス?コンテナ?みたいな考えのWebタイプとWorkerタイプが1つずつ使える
    • Dynos and the Dyno Managerに書いてあった

さっそくサインアップを済ませてログイン。ダッシュボードは本日時点でこんな感じ。


"PHP Get Started"を選ぶ。


StartまでのTutorialが出てきた。

Introduction

This tutorial will have you deploying a PHP app in minutes.
Hang on for a few more minutes to learn how it all works, so you can make the most out of Heroku.
The tutorial assumes that you have:
・a free Heroku account.
・PHP installed locally.
・Composer installed.

はじめにPCにHerokuを使うために"Heroku Toolbelt"なるものをインストールしなきゃならんらしい。なのでこれをダウンロードしてインストールする。Windows版しかなかったら暴れているところだが、無事Mac版も用意されていた。

Set up

In this step you will install the Heroku Toolbelt. This provides you access to the Heroku Command Line Interface (CLI), which can be used for managing and scaling your applications and add-ons. A key part of the toolbelt is the heroku local command, which can help in running your applications locally.

Once installed, you can use the heroku command from your command shell.
Log in using the email address and password you used when creating your Heroku account:

pkgをダウンロードし、インストール完了したらおもむろにTerminalを開いてheroku loginと打ってコマンド実行。
$ heroku login
heroku-cli: Installing Toolbelt v4... done
For more information on Toolbelt v4: https://github.com/heroku/heroku-cli
heroku-cli: Adding dependencies... done
heroku-cli: Installing core plugins... done
Enter your Heroku credentials.
Email: hogehoge@example.com
Password (typing will be hidden):
Logged in as hogehoge@example.com
$

成功したみたいだけれど、恐ろしく成功感がない。次はGitHubからサンプルソースを引っ張ってこいみたいなことが書いてあるので、適当な場所にHeroku用のフォルダを作ってそこで作業することにした。

Prepare the app

In this step, you will prepare a simple application that can be deployed.
Execute the following commands to clone the sample application:
$ git clone https://github.com/heroku/php-getting-started.git
$ cd php-getting-started
You now have a functioning git repository that contains a simple application as well as a composer.json file. Make sure you've installed Composer. Heroku uses Composer for dependency management in PHP projects, and the composer.json file indicates to Heroku that your application is written in PHP.

パッケージ管理にComposerを使っているみたい。だからComposer入れとけとか書いている。正直準備でだいぶだるい。

先にComposerをインストールする。
$ curl -sS https://getcomposer.org/installer | php
Some settings on your machine may cause stability issues with Composer.
If you encounter issues, try to change the following:

The OpenSSL library (0.9.8zc) used by PHP does not support TLSv1.2 or TLSv1.1.
If possible you should upgrade OpenSSL to version 1.0.1 or above.

Downloading...

Composer successfully installed to: /Users/fumio/Documents/HerokuProject/php-getting-started/composer.phar
Use it: php composer.phar

/usr/local/binあたりに移動させる。

$mv composer.phar /usr/local/bin/composer

実行してこうなったら入ってるんじゃないかと思う。
$ composer
______
/ ____/___ ____ ___ ____ ____ ________ _____
/ / / __ \/ __ `__ \/ __ \/ __ \/ ___/ _ \/ ___/
/ /___/ /_/ / / / / / / /_/ / /_/ (__ ) __/ /
\____/\____/_/ /_/ /_/ .___/\____/____/\___/_/
/_/
Composer version 1.0-dev (cff35071b68e286f68ac64908c990c15b3ac4a0d) 2016-01-31 15:50:19

Usage:
command [options] [arguments]

Options:
-h, --help Display this help message
-q, --quiet Do not output any message
-V, --version Display this app


さてGitHubから引っ張ってくる。
$ git  clone https://github.com/heroku/php-getting-started.git
Cloning into 'php-getting-started'...
remote: Counting objects: 148, done.
remote: Total 148 (delta 0), reused 0 (delta 0), pack-reused 148
Receiving objects: 100% (148/148), 32.44 KiB | 0 bytes/s, done.
Resolving deltas: 100% (55/55), done.
Checking connectivity... done.

php-getting-startedの中身はこんな感じ。
$ ls -aFC
./ .git/ Procfile app.json composer.lock
../ .gitignore README.md composer.json web/
$ ls -aFC web/
./ ../ .htaccess images/ index.php* stylesheets/ views/
$ ls -aFC web/views/
./ ../ header.html index.twig layout.html nav.html
$ ls -aFC web/images/
./ ../ favicon.png lang-logo.png
$ ls -aFC web/stylesheets/
./ ../ main.css

index.phpの中身だけ見てみた。
require('../vendor/autoload.php');

$app = new Silex\Application();
$app['debug'] = true;

// Register the monolog logging service
$app->register(new Silex\Provider\MonologServiceProvider(), array(
  'monolog.logfile' => 'php://stderr',
));

// Register view rendering
$app->register(new Silex\Provider\TwigServiceProvider(), array(
    'twig.path' => __DIR__.'/views',
));

// Our web handlers

$app->get('/', function() use($app) {
  $app['monolog']->addDebug('logging output.');
  return $app['twig']->render('index.twig');
});

$app->run();
だめだ。今日はここまで!

2016年1月31日日曜日

イメージキャプチャ用Chrome Extension:Awesome Screenshot

このエントリーをはてなブックマークに追加
この前、ブラウザの画面キャプチャ用にブラウザキャプチャ用Chrome Extension:FireShotを紹介したのだが、今度はスクリーンショットを撮った後に簡単に隠したいとこにぼかしやハイライトをつけたいなぁと思った時、FireShotではできなかったので、もう一度探してみるとこに。

そこで見つかったのが拡張機能Awesome Screenshotだった。


Chromeのツールバーからこんな感じで選べる。


例えばスクリーンショットに映った個人名などのあまり人に見せたくないものにぼかしを入れたい場合、Awesome Screenshotでスクリーンショットを撮った後、この水滴みたいな部分をクリックする。


するとシェイプでぼかしを入れたい部分を範囲選択できるので、これでどんどんぼかすことができる。


ただし、ローカルに保存するファイル名がWEBページのタイトルしかつかないので、同じページでいくつかのスクリーンショットを撮る場合はいちいち名前を変えてやらないといけない。

前回紹介したブラウザキャプチャ用Chrome Extension:FireShotだとデフォルトはWEBページのタイトルと時分秒などを設定でテンプレートとして設定できるので便利。

なので、スクリーンショットに簡単に加工を付けたい時と、ただ撮るだけの時とは使い分けるようにしてる。しかもChromeで完結しているのでWindowsやMacなどOSによって使い勝手のいいアプリを探す手間も省けて便利。

クラウド開発環境として使えそうなCloud 9 IDEを使ってみた

このエントリーをはてなブックマークに追加
無料でブラウザベースで扱えるCloud 9 IDEを試してみた。いっつもはローカルのPC内にVMwareなどで仮想マシンを作成し、ライブラリやミドルウェアをインストールしたりしていたのだが家や外出先などの環境によっていちいち作成しているとズレが出たりするので、ちょっと困ってた。

そんな中でみつけたのがCloud 9 IDE。どんな使い勝手か個人使用は無料なので使ってみた。


ログインしたらこんな感じ。


まずは"Create a new workspace"をクリック。


"Project Name"に適当な名前を入れて、今回は"PHP & Apache, MySQL pre-configured"を選択した。


するとこんな感じでProjectが出来上がる。


画面の下にはCLIも用意されていて、コマンドもスムーズに打てる。ちなみにブラウザ上にも関わらずTab補完も可能な感じで違和感ない。

OSはUbuntu 14.04.2 LTS。


テキストエディタでphp.iniも編集できるし、下部のCLIからviで編集もできる。


何、これ。超便利!

MySQLもつないでみよう。データベースどうなってるんだろう。

$ mysql -u root 
ERROR 2002 (HY000): Can't connect to local MySQL server through socket '/var/run/mysqld/mysqld.sock' (2)

動いてなかった。こっからどうするんだろう。上の"Run Project"をクリック。


するとこんな感じでコンソールに実行結果が出力される。URLも同時に出力されるので、これが自分の作ったサイトとして反映される。


作っておいたphpinfo()のページもちゃんと表示される。すごいじゃん!


ちなみにMySQLも"Run Project"の時点で起動されていた。

$ mysql -u root 
Welcome to the MySQL monitor.  Commands end with ; or \g.
Your MySQL connection id is 49
Server version: 5.5.44-0ubuntu0.14.04.1 (Ubuntu)

Copyright (c) 2000, 2015, Oracle and/or its affiliates. All rights reserved.

Oracle is a registered trademark of Oracle Corporation and/or its
affiliates. Other names may be trademarks of their respective
owners.

Type 'help;' or '\h' for help. Type '\c' to clear the current input statement.

mysql> show databases;
+--------------------+
| Database           |
+--------------------+
| information_schema |
| c9                 |
| mysql              |
| performance_schema |
+--------------------+
4 rows in set (0.00 sec)

mysql> use c9
Database changed
mysql> show tables;
Empty set (0.00 sec)

ちなみにworkspaceはprivateは1つしか作れないけど、publicにするといくつでもProjectを作れるみたい。
HWスペックはこんな感じ。CPU 1Core、Memory1GB、HDD5GB。


ちょっと試したりするなら最高の環境。ちょっと今度から使ってみよう。みなさんにもオススメです。


2016年1月28日木曜日

イメージキャプチャ用Chrome Extension:FireShot

このエントリーをはてなブックマークに追加
先に言っておくと小ネタだ。

ちょっとブラウザでスックリーンショットを撮りたいけど、ツールバーとかタブとか見えてていやだなぁって思ってしまうタチなので、余計なものを省いてスクリーンショットを撮ろうといちいち範囲選択してって割とめんどくさい。

そんな時にいいスクリーンショット取れるChrome Extensionないかなぁと思って探してたらあったのがこのFireShot。試したら割と便利だった。


こんな感じで色々と撮れる範囲を選べる。


設定でファイル名を選べたり、JPGとPNGで選べるし、ショートカットも使える。日本語も対応。少し変な日本語多いけどw


普通にブラウザごとまるっとスクリーンショットを撮ったらこう。


FireShotで見える部分だけで撮るとこうなる。ツールバーとかタブとかの余計な部分がなくなっていい感じ。


全部のページを撮るとこう。


これでさくっと撮れて便利だ。

2016年1月1日金曜日

日本語の形態素解析を利用できるようにする

このエントリーをはてなブックマークに追加
これは今まで個人的には何度もやってきてるんだけど、作業メモといった形で残しておく。


Mecab,IPADicのサイトから一通りダウンロードしてインストールする。

Mecab


# tar -zxfv mecab-X.X.tar.gz
# cd mecab-X.X
# ./configure 
# make
# make install

IPADic


# tar -zxfv mecab-ipadic-2.7.0-XXXX.tar.gz
# cd mecab-ipadic-2.7.0-XXXX
# ./configure -with-charset=utf8
# make
# make install

MecabのPythonバインディングもインストールしておく。

Mecab-python


# wget https://mecab.googlecode.com/files/mecab-python-0.996.tar.gz
# cd mecab-python-0.996
# python setup.py build
# python setup.py install

試してみよう。

$ mecab
2016年が始まりました
2016 名詞,数,*,*,*,*,*
年 名詞,接尾,助数詞,*,*,*,年,ネン,ネン
が 助詞,格助詞,一般,*,*,*,が,ガ,ガ
始まり 動詞,自立,*,*,五段・ラ行,連用形,始まる,ハジマリ,ハジマリ
まし 助動詞,*,*,*,特殊・マス,連用形,ます,マシ,マシ
た 助動詞,*,*,*,特殊・タ,基本形,た,タ,タ
EOS

できた、できた。

今日の作業

名刺のデザイン考えたりしてました。正月感一切ないや。

Fedora23にDock(Docky)を導入してみよう

このエントリーをはてなブックマークに追加
あけましておめでとうございます。今年も宜しくお願いします。


いきなり年の頭から気合入れすぎるとダメになる気がするので、テーマはゆるりと。

Fedora23のデスクトップを使っているとウィンドウの切り替えがいささか面倒くさくなってきたので、MacのDockらしいものをインストールしてみたいと思い探しているとDockyなるものが見つかったのでインストールしてみることにした。

# dnf install docky
メタデータの期限切れの確認は、0:20:49 前の Fri Jan  1 02:26:56 2016 に実施しました。
依存性が解決されました。
================================================================================
 Package               アーキテクチャ
                                バージョン                      リポジトリ
                                                                           容量
================================================================================
インストール中:
 ORBit2                x86_64   2.14.19-14.fc23                 fedora    180 k
 dbus-sharp            x86_64   1:0.7.0-14.fc23                 fedora     84 k
 dbus-sharp-glib       x86_64   0.5.0-12.fc23                   fedora     16 k
 docky                 x86_64   2.2.0-6.fc23                    fedora    733 k
 gamin                 x86_64   0.1.10-18.fc23                  fedora    133 k
 gio-sharp             x86_64   0.3-13.fc23                     fedora     95 k
 gnome-desktop         x86_64   2.32.0-16.fc23                  fedora    672 k
 gnome-desktop-sharp   x86_64   2.26.0-27.fc23                  updates   102 k
 gnome-keyring-sharp   x86_64   1.0.1-0.20.133722svn.fc23       fedora     28 k
 gnome-sharp           x86_64   2.24.2-10.fc23                  fedora    315 k
 gnome-vfs2            x86_64   2.24.4-19.fc23                  fedora    384 k
 gnome-vfs2-common     noarch   2.24.4-19.fc23                  fedora    396 k
 gtk-sharp2            x86_64   2.12.26-2.fc23                  fedora    684 k
 gtk-sharp2-gapi       x86_64   2.12.26-2.fc23                  fedora    204 k
 gtksourceview2        x86_64   2.11.2-20.fc23                  fedora    681 k
 libIDL                x86_64   0.8.14-10.fc23                  fedora     90 k
 libart_lgpl           x86_64   2.3.21-13.fc23                  fedora     71 k
 libbonobo             x86_64   2.32.1-8.fc22                   fedora    442 k
 libbonoboui           x86_64   2.24.5-9.fc23                   fedora    347 k
 libgdiplus            x86_64   3.12-3.fc23                     fedora    167 k
 libglade2             x86_64   2.6.4-13.fc23                   fedora     67 k
 libgnome              x86_64   2.32.1-10.fc23                  fedora    745 k
 libgnomecanvas        x86_64   2.30.3-10.fc23                  fedora    232 k
 libgnomeui            x86_64   2.24.5-11.fc23                  fedora    796 k
 libwnck               x86_64   2.31.0-5.fc23                   fedora    364 k
 mono-addins           x86_64   1.1-2.fc23                      fedora    421 k
 mono-core             x86_64   4.0.5-2.fc23                    updates    13 M
 mono-data             x86_64   4.0.5-2.fc23                    updates   3.7 M
 mono-data-sqlite      x86_64   4.0.5-2.fc23                    updates    97 k
 mono-extras           x86_64   4.0.5-2.fc23                    updates   457 k
 mono-mvc              x86_64   4.0.5-2.fc23                    updates   478 k
 mono-wcf              x86_64   4.0.5-2.fc23                    updates   848 k
 mono-web              x86_64   4.0.5-2.fc23                    updates   2.2 M
 mono-winforms         x86_64   4.0.5-2.fc23                    updates   1.6 M
 ndesk-dbus            x86_64   0.6.1a-19.fc23                  fedora     56 k
 ndesk-dbus-glib       x86_64   0.4.1-20.fc23                   fedora     17 k
 notify-sharp          x86_64   0.4.0-0.25.20100411svn.fc23     fedora     20 k
 pycairo               x86_64   1.10.0-2.fc23                   fedora    515 k
 pygobject2            x86_64   2.28.6-14.fc23                  fedora    232 k
 pygtk2                x86_64   2.24.0-12.fc23                  fedora    921 k
 python-xpyb           x86_64   1.3.1-5.fc23                    fedora    138 k
 vte                   x86_64   0.28.2-16.fc23                  fedora    374 k

トランザクションの要約
================================================================================
インストール  42 Packages

総ダウンロード容量: 33 M
インストール済み容量: 114 M
これでいいですか? [y/N]: y
パッケージをダウンロードしています:
(1/42): dbus-sharp-0.7.0-14.fc23.x86_64.rpm     370 kB/s |  84 kB     00:00    
(2/42): gio-sharp-0.3-13.fc23.x86_64.rpm        981 kB/s |  95 kB     00:00    
(3/42): docky-2.2.0-6.fc23.x86_64.rpm           2.0 MB/s | 733 kB     00:00    
(4/42): gnome-keyring-sharp-1.0.1-0.20.133722sv 407 kB/s |  28 kB     00:00    
(5/42): gnome-sharp-2.24.2-10.fc23.x86_64.rpm   2.6 MB/s | 315 kB     00:00    
(6/42): dbus-sharp-glib-0.5.0-12.fc23.x86_64.rp  28 kB/s |  16 kB     00:00    
(7/42): gtk-sharp2-2.12.26-2.fc23.x86_64.rpm    1.9 MB/s | 684 kB     00:00    
(8/42): gtk-sharp2-gapi-2.12.26-2.fc23.x86_64.r 636 kB/s | 204 kB     00:00    
(9/42): ndesk-dbus-0.6.1a-19.fc23.x86_64.rpm    619 kB/s |  56 kB     00:00    
(10/42): ndesk-dbus-glib-0.4.1-20.fc23.x86_64.r 186 kB/s |  17 kB     00:00    
(11/42): notify-sharp-0.4.0-0.25.20100411svn.fc 261 kB/s |  20 kB     00:00    
(12/42): libart_lgpl-2.3.21-13.fc23.x86_64.rpm  951 kB/s |  71 kB     00:00    
(13/42): libbonobo-2.32.1-8.fc22.x86_64.rpm     2.0 MB/s | 442 kB     00:00    
(14/42): gnome-vfs2-2.24.4-19.fc23.x86_64.rpm   844 kB/s | 384 kB     00:00    
(15/42): mono-addins-1.1-2.fc23.x86_64.rpm      433 kB/s | 421 kB     00:00    
(16/42): libbonoboui-2.24.5-9.fc23.x86_64.rpm   775 kB/s | 347 kB     00:00    
(17/42): libgnome-2.32.1-10.fc23.x86_64.rpm     1.8 MB/s | 745 kB     00:00    
(18/42): ORBit2-2.14.19-14.fc23.x86_64.rpm      1.8 MB/s | 180 kB     00:00    
(19/42): libglade2-2.6.4-13.fc23.x86_64.rpm     1.2 MB/s |  67 kB     00:00    
(20/42): libgnomecanvas-2.30.3-10.fc23.x86_64.r 535 kB/s | 232 kB     00:00    
(21/42): gamin-0.1.10-18.fc23.x86_64.rpm        1.6 MB/s | 133 kB     00:00    
(22/42): libIDL-0.8.14-10.fc23.x86_64.rpm       1.6 MB/s |  90 kB     00:00    
(23/42): gnome-vfs2-common-2.24.4-19.fc23.noarc 1.1 MB/s | 396 kB     00:00    
(24/42): libgnomeui-2.24.5-11.fc23.x86_64.rpm   756 kB/s | 796 kB     00:01    
(25/42): mono-web-4.0.5-2.fc23.x86_64.rpm       4.4 MB/s | 2.2 MB     00:00    
(26/42): mono-wcf-4.0.5-2.fc23.x86_64.rpm       2.5 MB/s | 848 kB     00:00    
(27/42): mono-data-sqlite-4.0.5-2.fc23.x86_64.r 1.4 MB/s |  97 kB     00:00    
(28/42): mono-mvc-4.0.5-2.fc23.x86_64.rpm       2.4 MB/s | 478 kB     00:00    
(29/42): mono-extras-4.0.5-2.fc23.x86_64.rpm    2.4 MB/s | 457 kB     00:00    
(30/42): mono-data-4.0.5-2.fc23.x86_64.rpm      3.5 MB/s | 3.7 MB     00:01    
(31/42): mono-winforms-4.0.5-2.fc23.x86_64.rpm  3.6 MB/s | 1.6 MB     00:00    
(32/42): gnome-desktop-sharp-2.26.0-27.fc23.x86 2.0 MB/s | 102 kB     00:00    
(33/42): gtksourceview2-2.11.2-20.fc23.x86_64.r 1.9 MB/s | 681 kB     00:00    
(34/42): libwnck-2.31.0-5.fc23.x86_64.rpm       822 kB/s | 364 kB     00:00    
(35/42): vte-0.28.2-16.fc23.x86_64.rpm          1.5 MB/s | 374 kB     00:00    
(36/42): libgdiplus-3.12-3.fc23.x86_64.rpm      1.2 MB/s | 167 kB     00:00    
(37/42): gnome-desktop-2.32.0-16.fc23.x86_64.rp 1.4 MB/s | 672 kB     00:00    
(38/42): pycairo-1.10.0-2.fc23.x86_64.rpm       2.4 MB/s | 515 kB     00:00    
(39/42): pygobject2-2.28.6-14.fc23.x86_64.rpm   1.1 MB/s | 232 kB     00:00    
(40/42): python-xpyb-1.3.1-5.fc23.x86_64.rpm    1.9 MB/s | 138 kB     00:00    
(41/42): mono-core-4.0.5-2.fc23.x86_64.rpm      4.0 MB/s |  13 MB     00:03    
(42/42): pygtk2-2.24.0-12.fc23.x86_64.rpm       1.5 MB/s | 921 kB     00:00    
--------------------------------------------------------------------------------
合計                                            4.5 MB/s |  33 MB     00:07     
トランザクションの確認を実行中...
トランザクションの確認に成功しました。
トランザクションのテストを実行中...
トランザクションのテストに成功しました。
トランザクションを実行中...
  インストール中  : libglade2-2.6.4-13.fc23.x86_64                         1/42 
  インストール中  : libart_lgpl-2.3.21-13.fc23.x86_64                      2/42 
  インストール中  : libgnomecanvas-2.30.3-10.fc23.x86_64                   3/42 
  インストール中  : python-xpyb-1.3.1-5.fc23.x86_64                        4/42 
  インストール中  : pycairo-1.10.0-2.fc23.x86_64                           5/42 
  インストール中  : pygobject2-2.28.6-14.fc23.x86_64                       6/42 
  インストール中  : pygtk2-2.24.0-12.fc23.x86_64                           7/42 
  インストール中  : gnome-desktop-2.32.0-16.fc23.x86_64                    8/42 
  インストール中  : libgdiplus-3.12-3.fc23.x86_64                          9/42 
  インストール中  : mono-data-sqlite-4.0.5-2.fc23.x86_64                  10/42 
  インストール中  : mono-data-4.0.5-2.fc23.x86_64                         11/42 
  インストール中  : mono-web-4.0.5-2.fc23.x86_64                          12/42 
  インストール中  : mono-mvc-4.0.5-2.fc23.x86_64                          13/42 
  インストール中  : mono-wcf-4.0.5-2.fc23.x86_64                          14/42 
  インストール中  : mono-core-4.0.5-2.fc23.x86_64                         15/42 
  インストール中  : mono-winforms-4.0.5-2.fc23.x86_64                     16/42 
  インストール中  : mono-extras-4.0.5-2.fc23.x86_64                       17/42 
  インストール中  : gtk-sharp2-2.12.26-2.fc23.x86_64                      18/42 
  インストール中  : dbus-sharp-1:0.7.0-14.fc23.x86_64                     19/42 
  インストール中  : dbus-sharp-glib-0.5.0-12.fc23.x86_64                  20/42 
  インストール中  : ndesk-dbus-0.6.1a-19.fc23.x86_64                      21/42 
  インストール中  : ndesk-dbus-glib-0.4.1-20.fc23.x86_64                  22/42 
  インストール中  : notify-sharp-0.4.0-0.25.20100411svn.fc23.x86_64       23/42 
  インストール中  : gio-sharp-0.3-13.fc23.x86_64                          24/42 
  インストール中  : gnome-keyring-sharp-1.0.1-0.20.133722svn.fc23.x86_6   25/42 
  インストール中  : mono-addins-1.1-2.fc23.x86_64                         26/42 
  インストール中  : gtk-sharp2-gapi-2.12.26-2.fc23.x86_64                 27/42 
  インストール中  : vte-0.28.2-16.fc23.x86_64                             28/42 
  インストール中  : libwnck-2.31.0-5.fc23.x86_64                          29/42 
  インストール中  : gtksourceview2-2.11.2-20.fc23.x86_64                  30/42 
  インストール中  : gnome-desktop-sharp-2.26.0-27.fc23.x86_64             31/42 
  インストール中  : libIDL-0.8.14-10.fc23.x86_64                          32/42 
  インストール中  : ORBit2-2.14.19-14.fc23.x86_64                         33/42 
  インストール中  : libbonobo-2.32.1-8.fc22.x86_64                        34/42 
  インストール中  : gamin-0.1.10-18.fc23.x86_64                           35/42 
  インストール中  : gnome-vfs2-common-2.24.4-19.fc23.noarch               36/42 
  インストール中  : gnome-vfs2-2.24.4-19.fc23.x86_64                      37/42 
  インストール中  : libgnome-2.32.1-10.fc23.x86_64                        38/42 
  インストール中  : libbonoboui-2.24.5-9.fc23.x86_64                      39/42 
  インストール中  : libgnomeui-2.24.5-11.fc23.x86_64                      40/42 
  インストール中  : gnome-sharp-2.24.2-10.fc23.x86_64                     41/42 
  インストール中  : docky-2.2.0-6.fc23.x86_64                             42/42 
  検証中          : docky-2.2.0-6.fc23.x86_64                              1/42 
  検証中          : dbus-sharp-1:0.7.0-14.fc23.x86_64                      2/42 
  検証中          : dbus-sharp-glib-0.5.0-12.fc23.x86_64                   3/42 
  検証中          : gio-sharp-0.3-13.fc23.x86_64                           4/42 
  検証中          : gnome-keyring-sharp-1.0.1-0.20.133722svn.fc23.x86_6    5/42 
  検証中          : gnome-sharp-2.24.2-10.fc23.x86_64                      6/42 
  検証中          : gtk-sharp2-2.12.26-2.fc23.x86_64                       7/42 
  検証中          : gtk-sharp2-gapi-2.12.26-2.fc23.x86_64                  8/42 
  検証中          : mono-addins-1.1-2.fc23.x86_64                          9/42 
  検証中          : ndesk-dbus-0.6.1a-19.fc23.x86_64                      10/42 
  検証中          : ndesk-dbus-glib-0.4.1-20.fc23.x86_64                  11/42 
  検証中          : notify-sharp-0.4.0-0.25.20100411svn.fc23.x86_64       12/42 
  検証中          : gnome-vfs2-2.24.4-19.fc23.x86_64                      13/42 
  検証中          : libart_lgpl-2.3.21-13.fc23.x86_64                     14/42 
  検証中          : libbonobo-2.32.1-8.fc22.x86_64                        15/42 
  検証中          : libbonoboui-2.24.5-9.fc23.x86_64                      16/42 
  検証中          : libgnome-2.32.1-10.fc23.x86_64                        17/42 
  検証中          : libgnomecanvas-2.30.3-10.fc23.x86_64                  18/42 
  検証中          : libgnomeui-2.24.5-11.fc23.x86_64                      19/42 
  検証中          : ORBit2-2.14.19-14.fc23.x86_64                         20/42 
  検証中          : libglade2-2.6.4-13.fc23.x86_64                        21/42 
  検証中          : gamin-0.1.10-18.fc23.x86_64                           22/42 
  検証中          : gnome-vfs2-common-2.24.4-19.fc23.noarch               23/42 
  検証中          : libIDL-0.8.14-10.fc23.x86_64                          24/42 
  検証中          : mono-core-4.0.5-2.fc23.x86_64                         25/42 
  検証中          : mono-web-4.0.5-2.fc23.x86_64                          26/42 
  検証中          : mono-wcf-4.0.5-2.fc23.x86_64                          27/42 
  検証中          : mono-data-4.0.5-2.fc23.x86_64                         28/42 
  検証中          : mono-data-sqlite-4.0.5-2.fc23.x86_64                  29/42 
  検証中          : mono-mvc-4.0.5-2.fc23.x86_64                          30/42 
  検証中          : mono-extras-4.0.5-2.fc23.x86_64                       31/42 
  検証中          : mono-winforms-4.0.5-2.fc23.x86_64                     32/42 
  検証中          : gnome-desktop-sharp-2.26.0-27.fc23.x86_64             33/42 
  検証中          : gtksourceview2-2.11.2-20.fc23.x86_64                  34/42 
  検証中          : libwnck-2.31.0-5.fc23.x86_64                          35/42 
  検証中          : vte-0.28.2-16.fc23.x86_64                             36/42 
  検証中          : gnome-desktop-2.32.0-16.fc23.x86_64                   37/42 
  検証中          : libgdiplus-3.12-3.fc23.x86_64                         38/42 
  検証中          : pycairo-1.10.0-2.fc23.x86_64                          39/42 
  検証中          : pygtk2-2.24.0-12.fc23.x86_64                          40/42 
  検証中          : pygobject2-2.28.6-14.fc23.x86_64                      41/42 
  検証中          : python-xpyb-1.3.1-5.fc23.x86_64                       42/42 

インストール:
  ORBit2.x86_64 2.14.19-14.fc23                                                 
  dbus-sharp.x86_64 1:0.7.0-14.fc23                                             
  dbus-sharp-glib.x86_64 0.5.0-12.fc23                                          
  docky.x86_64 2.2.0-6.fc23                                                     
  gamin.x86_64 0.1.10-18.fc23                                                   
  gio-sharp.x86_64 0.3-13.fc23                                                  
  gnome-desktop.x86_64 2.32.0-16.fc23                                           
  gnome-desktop-sharp.x86_64 2.26.0-27.fc23                                     
  gnome-keyring-sharp.x86_64 1.0.1-0.20.133722svn.fc23                          
  gnome-sharp.x86_64 2.24.2-10.fc23                                             
  gnome-vfs2.x86_64 2.24.4-19.fc23                                              
  gnome-vfs2-common.noarch 2.24.4-19.fc23                                       
  gtk-sharp2.x86_64 2.12.26-2.fc23                                              
  gtk-sharp2-gapi.x86_64 2.12.26-2.fc23                                         
  gtksourceview2.x86_64 2.11.2-20.fc23                                          
  libIDL.x86_64 0.8.14-10.fc23                                                  
  libart_lgpl.x86_64 2.3.21-13.fc23                                             
  libbonobo.x86_64 2.32.1-8.fc22                                                
  libbonoboui.x86_64 2.24.5-9.fc23                                              
  libgdiplus.x86_64 3.12-3.fc23                                                 
  libglade2.x86_64 2.6.4-13.fc23                                                
  libgnome.x86_64 2.32.1-10.fc23                                                
  libgnomecanvas.x86_64 2.30.3-10.fc23                                          
  libgnomeui.x86_64 2.24.5-11.fc23                                              
  libwnck.x86_64 2.31.0-5.fc23                                                  
  mono-addins.x86_64 1.1-2.fc23                                                 
  mono-core.x86_64 4.0.5-2.fc23                                                 
  mono-data.x86_64 4.0.5-2.fc23                                                 
  mono-data-sqlite.x86_64 4.0.5-2.fc23                                          
  mono-extras.x86_64 4.0.5-2.fc23                                               
  mono-mvc.x86_64 4.0.5-2.fc23                                                  
  mono-wcf.x86_64 4.0.5-2.fc23                                                  
  mono-web.x86_64 4.0.5-2.fc23                                                  
  mono-winforms.x86_64 4.0.5-2.fc23                                             
  ndesk-dbus.x86_64 0.6.1a-19.fc23                                              
  ndesk-dbus-glib.x86_64 0.4.1-20.fc23                                          
  notify-sharp.x86_64 0.4.0-0.25.20100411svn.fc23                               
  pycairo.x86_64 1.10.0-2.fc23                                                  
  pygobject2.x86_64 2.28.6-14.fc23                                              
  pygtk2.x86_64 2.24.0-12.fc23                                                  
  python-xpyb.x86_64 1.3.1-5.fc23                                               
  vte.x86_64 0.28.2-16.fc23                                                     

完了しました!

…なんかいっぱいインストールされた。

アクティビティからDockyをクリックして有効化するとこんな感じに動きます。


ちょっと使い勝手が良くなったかなぁ。

2015年12月8日火曜日

PHP 7.0.0が正式にリリースされたのでインストールしてみる

このエントリーをはてなブックマークに追加
PHP 7.0.0が2015/12/3に正式リリースされたのでインストールだけやってみた。フレームワークとか何が対応済みかとかまでは調べていない。

PHP7.0.0の公式リリースノートによれば以下のような変更が実装されたという感じ。

Improved performance: PHP 7 is up to twice as fast as PHP 5.6
ーーPHP5.6に比べて2倍速くなった
Significantly reduced memory usage
ーーメモリ使用量が減った
Abstract Syntax Tree
ーー抽象構文木の採用
Consistent 64-bit support
ーー本格的な64bitサポート
Improved Exception hierarchy
ーー例外階層の改善
Many fatal errors converted to Exceptions
ーー多くの致命的なエラーを例外へ
Secure random number generator
ーーセキュアな乱数生成
Removed old and unsupported SAPIs and extensions
ーー古くてサポートされなくなったSAPIと拡張の削除
The null coalescing operator (??)
ーーnull 合体演算子(??)の実装
Return and Scalar Type Declarations
ーー関数のretrun値とスカラー型の宣言
Anonymous Classes
ーー匿名クラス
Zero cost asserts
ーー低コスト化


ちなみに試す同一環境には既にPHP5.6.15がインストールされているので共存できる環境を目指してみる。OSはCentOS7、Apacheは2.4.17がインストールされている環境。

とりあえずインストール先のprefixは/usr/local/php7としてインストールするようにすれば既存のものには影響がない"はず"

# ./configure --enable-mbstring=all --enable-mbregex --with-apxs2=/usr/local/apache2/bin/apxs --with-openssl --with-zlib --with-pdo-mysql=/usr/local/mysql --prefix=/usr/local/php7
# make
# make install


ここまで行うとhttpd.confに
LoadModule php7_module modules/libphp7.so
が追加されている。

前のPHP5のモジュール読み込み部分に関してはコメントアウトしておく
#LoadModule php5_module modules/libphp5.so

一応、php.iniを新しいのに置き換えてやる。

# mv /usr/local/lib/php.ini /usr/local/lib/php-5.ini.20151208
# cp -ipr /usr/local/src/php-7.0.0/php.ini-development /usr/local/lib/php.ini

Apacheを再起動してphpinfo()で確認してみる。

# systemctl start httpd.service


手順的には今までのPHP5.6系とほとんど変わっていなかった。

今日の作業

目標みつからず全然遊んでました。。。

2015年11月24日火曜日

DockerでCentOSのコンテナを作る

このエントリーをはてなブックマークに追加

CentOSのコンテナを作成したいと思うので、docker searchコマンドで確認する。

$ docker search centos
NAME                                        DESCRIPTION                                     STARS     OFFICIAL   AUTOMATED
centos                                      The official build of CentOS.                   1652      [OK]
jdeathe/centos-ssh                          CentOS-6 6.6 x86_64 / EPEL/IUS Repos / Ope...   11                   [OK]
blalor/centos                               Bare-bones base CentOS 6.5 image                9                    [OK]
million12/centos-supervisor・・・
:
:
:
見つけた一番上のOffcialイメージをダウンロードする。
$ docker pull centos
Using default tag: latest
latest: Pulling from library/centos
fa5be2806d4c: Pull complete
0cd86ce0a197: Pull complete
e9407f1d4b65: Pull complete
c9853740aa05: Pull complete
e9fa5d3a0d0e: Pull complete
Digest: sha256:c96eeb93f2590858b9e1396e808d817fa0ba4076c68b59395445cb957b524408
Status: Downloaded newer image for centos:latest
イメージができているか確認する。
$ docker images
REPOSITORY          TAG                 IMAGE ID            CREATED             VIRTUAL SIZE
centos              latest              e9fa5d3a0d0e        5 weeks ago         172.3 MB
起動して確認する。
$ docker run -t -i centos:latest /bin/bash
[root@25fc2734ad99 /]# ls
bin  dev  etc  home  lib  lib64  lost+found  media  mnt  opt  proc  root  run  sbin  srv  sys  tmp  usr  var
[root@25fc2734ad99 /]# whoami
root
[root@25fc2734ad99 /]# systemctl list-unit-files
UNIT FILE                            STATE
proc-sys-fs-binfmt_misc.automount    static
dev-hugepages.mount                  masked
dev-mqueue.mount                     static
proc-sys-fs-binfmt_misc.mount        static
:
:
終わって、コンテナ自体も終了しているか確認する。
[root@25fc2734ad99 /]# exit
exit
$ docker ps -a
CONTAINER ID        IMAGE               COMMAND             CREATED             STATUS                     PORTS               NAMES
25fc2734ad99        centos:latest       "/bin/bash"         11 minutes ago      Exited (0) 4 seconds ago                       jovial_meninsky

今日の作業

大阪へ戻ります。

2015年11月23日月曜日

久しぶりにMacでDockerを動かそうとした

このエントリーをはてなブックマークに追加

最近、あまり用事がなかったので無かったので、MacにインストールしたDocker環境をほったらかしにしてたけど、久しぶりに触ろうかと思ったらDockerのバージョンアップと共にBoot2DockerからDocker Toolboxに変更になっていた。

以下、メモ。以前インストールしていたBoot2Dockerはアンインストールしていないけど。。。

ちなみにインストール手順はDockerの公式ドキュメントである"Get Started with Docker for Mac OS X"を参考にした

Docker Toolboxのページから"Download (Mac)"をクリックしダウンロードする。

こんな感じでインストーラが動くので指示に従って進める。


iTermで動かすとこんな感じで起動されるので、ターミナルを眺める。

Creating Machine default...
Creating CA: /Users/xxx/.docker/machine/certs/ca.pem
Creating client certificate: /Users/xxx/.docker/machine/certs/cert.pem
Running pre-create checks...
Creating machine...
(default) OUT | Creating VirtualBox VM...
(default) OUT | Creating SSH key...
(default) OUT | Starting VirtualBox VM...
(default) OUT | Starting VM...
Waiting for machine to be running, this may take a few minutes...
Machine is running, waiting for SSH to be available...
Detecting operating system of created instance...
Detecting the provisioner...
Provisioning created instance...
Copying certs to the local machine directory...
Copying certs to the remote machine...
Setting Docker configuration on the remote daemon...
To see how to connect Docker to this machine, run: /usr/local/bin/docker-machine env default
Setting environment variables for machine default...


## .
## ## ## ==
## ## ## ## ## ===
/"""""""""""""""""\___/ ===
~~~ {~~ ~~~~ ~~~ ~~~~ ~~~ ~ / ===- ~~~
\______ o __/
\ \ __/
\____\_______/


docker is configured to use the default machine with IP 192.168.99.100
For help getting started, check out the docs at https://docs.docker.com

はい終了。


dockerコマンドで確認する。

# docker version
Client:
 Version:      1.9.1
 API version:  1.21
 Go version:   go1.4.3
 Git commit:   a34a1d5
 Built:        Fri Nov 20 17:56:04 UTC 2015
 OS/Arch:      darwin/amd64

Server:
 Version:      1.9.1
 API version:  1.21
 Go version:   go1.4.3
 Git commit:   a34a1d5
 Built:        Fri Nov 20 17:56:04 UTC 2015
 OS/Arch:      linux/amd64

VirtualBoxの画面を見ると以前のBoot2Dockerのvmはそのまま、新しいDocker Machineは"default"で作成されている。昔のは捨ててしまおう。


以前の boot2dockerコマンドはすべて docker-machineコマンドに置き換えられている。

こんな感じ。

$ docker-machine ls
NAME      ACTIVE   DRIVER       STATE     URL                         SWARM
default   *        virtualbox   Running   tcp://192.168.99.100:2376

$ docker-machine status default
Running

$ docker-machine stop default

$ docker-machine start default
(default) OUT | Starting VM...
Started machines may have new IP addresses. You may need to re-run the `docker-machine env` command.
$ docker-machine env default
export DOCKER_TLS_VERIFY="1"
export DOCKER_HOST="tcp://192.168.99.100:2376"
export DOCKER_CERT_PATH="/Users/fumio/.docker/machine/machines/default"
export DOCKER_MACHINE_NAME="default"
# Run this command to configure your shell:
# eval "$(docker-machine env default)"

今日の作業

大阪から東京への移動と私用でほぼ終了。。。

2015年11月13日金曜日

EclipseからFedora23へRSEでサーバにSSH接続できない

このエントリーをはてなブックマークに追加

いつもサーバへソースなどファイルをアップロードする時にはEclipseのRSE経由でSFTPで行っているのだが、今使っているFedora23へ同様にしようとすると下記のようなメッセージが出て接続できなかった。

"172.16.33.160:22" 上で sshd の接続に失敗しました
Session.connect: java.security.InvalidAlgorithmParameterException: Prime size must be multiple of 64, and can only range from 512 to 1024 (inclusive)

その他のCentOS7などのサーバへは同様に接続できる。

クライアントの環境はこんな感じ。

OS:MacOS El Capitan
Java:1.7.0_67
Eclipse:Version: Mars.1 Release (4.5.1)、Build id 20150924-1200
RSE:3.7.0.201505221634

調べてみると「SunJCE の Diffie-Hellman アルゴリズムで 1024 ビットを超える素数が使えない」にJava8にアップデートしたらいけそうな感じだったのでしてみることに。

Java SDK8をダウンロードしてきてインストール。

インストールされたか今までのバージョンの確認をしてみる。
# java -version
java version "1.8.0_65"
Java(TM) SE Runtime Environment (build 1.8.0_65-b17)
Java HotSpot(TM) 64-Bit Server VM (build 25.65-b01, mixed mode)
# /usr/libexec/java_home -V
Matching Java Virtual Machines (4):
    1.8.0_65, x86_64: "Java SE 8" /Library/Java/JavaVirtualMachines/jdk1.8.0_65.jdk/Contents/Home
    1.7.0_67, x86_64: "Java SE 7" /Library/Java/JavaVirtualMachines/jdk1.7.0_67.jdk/Contents/Home
    1.6.0_65-b14-468, x86_64: "Java SE 6" /Library/Java/JavaVirtualMachines/1.6.0.jdk/Contents/Home
    1.6.0_65-b14-468, i386: "Java SE 6" /Library/Java/JavaVirtualMachines/1.6.0.jdk/Contents/Home

/Library/Java/JavaVirtualMachines/jdk1.8.0_65.jdk/Contents/Home

Eclipseを再起動して、再度RSEで接続してみるといけた。

ちなみにJavaのバージョンを切り替える場合は下記のようにする。
# export JAVA_HOME=`/usr/libexec/java_home -v 1.7.0_67`
# java -version
java version "1.7.0_67"
Java(TM) SE Runtime Environment (build 1.7.0_67-b01)
Java HotSpot(TM) 64-Bit Server VM (build 24.65-b04, mixed mode)
# export JAVA_HOME=`/usr/libexec/java_home -v 1.8.0_65`
# java -version
java version "1.8.0_65"
Java(TM) SE Runtime Environment (build 1.8.0_65-b17)
Java HotSpot(TM) 64-Bit Server VM (build 25.65-b01, mixed mode)